What is OhMyRunPod?
OhMyRunPod is a Python package that solves one of the most common Runpod user challenges: easily transferring files to and from your Pod. While OhMyRunPod includes various features, the SFTP setup functionality is the one we want to highlight to help get you started with file transfer software such as FileZilla or similar tools.Check the repository for additional features, updates, and documentation: github.com/kodxana/OhMyRunPod-python
Key features
Easy File Transfer
Simplified file transfer between your local machine and Runpod instances using SFTP or Croc
Automatic SSH Setup
Automatically configures SSH access with secure key generation and password management
Requirements
Before getting started with OhMyRunPod, make sure you have:- An active Runpod account with a running Pod.
- Python 3.6 or higher installed on your local machine.
- Port 22 exposed in your Pod’s TCP ports configuration (for SFTP transfers).
Installation
Install OhMyRunPod using pip:Quick start: file transfer
The most common use case for OhMyRunPod is transferring files between your local machine and Runpod instances.1
Ensure Port 22 is Exposed
Before starting, make sure port 22 is exposed in your Pod. This is required for SFTP transfers.To expose port 22:
- Go to your Pod in the Runpod console
- Click Edit Pod
- Under the TCP Ports section, add port
22 - Save the changes
2
Run the file transfer command
Execute the file transfer command:
3
Choose a transfer method
You’ll be presented with transfer options:
- Croc: Easy peer-to-peer file transfer (recommended for quick transfers)
- SFTP: Traditional file transfer via SSH/SFTP clients (recommended for persistent connections)
4
SFTP setup complete
If you choose SFTP, OhMyRunpod will automatically: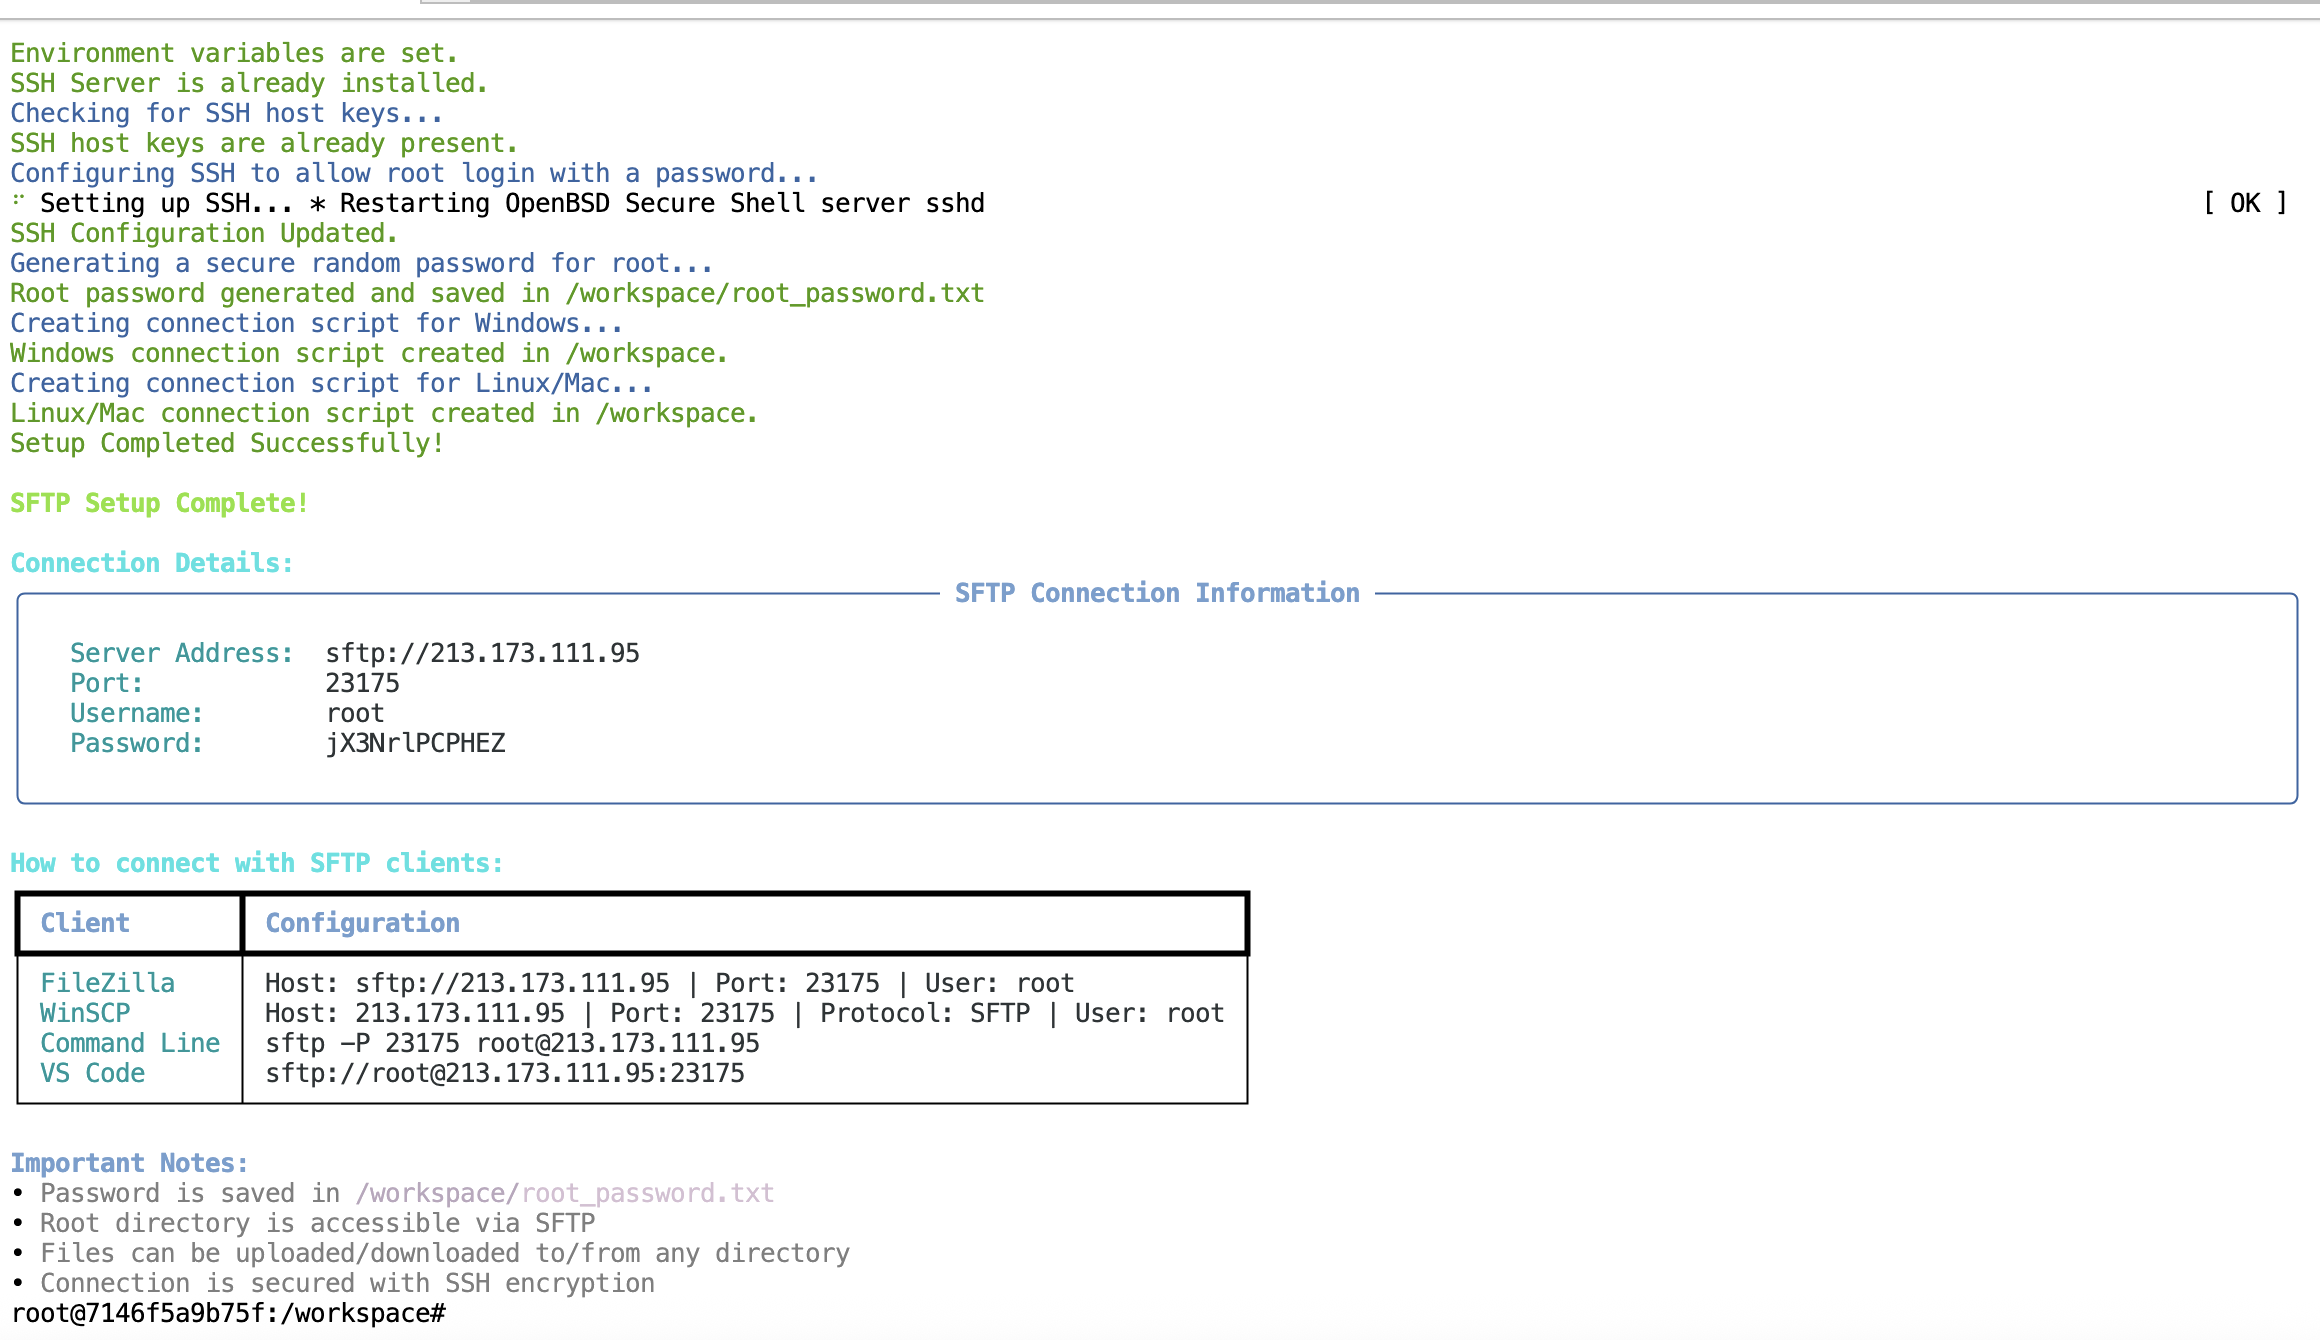
- Install and configure SSH server
- Set up SSH keys
- Generate a secure password
- Create connection scripts for your operating system
- Complete connection information (server address, port, username, password)
- Platform-specific connection instructions for FileZilla, WinSCP, Command Line, and VS Code
- Password saved to
/workspace/root_password.txtfor reference
What can you do after setup?
Once SFTP is configured, you can:- Upload datasets: Transfer training data directly to
/workspace/ - Download models: Pull trained checkpoints back to your local machine
- Sync code: Use VS Code Remote-SSH for live editing
- Backup files: Regular backups of important work
- Use any SFTP client: FileZilla, WinSCP, or command line tools
Troubleshooting
Connection refused on port 22
Connection refused on port 22
Problem: Cannot connect via SFTP, getting “Connection refused” errorSolution:
- Ensure port 22 is exposed in your Pod (Pod > Edit Pod > TCP Ports > Add 22)
- Restart your Pod after adding the port
- Re-run
OhMyRunpod --file-transferto reconfigure SSH
Permission denied when connecting
Permission denied when connecting
Problem: Getting “Permission denied” when trying to connect via SFTPSolution:
- Check that you’re using the correct password from
/workspace/root_password.txt - Ensure you’re using username
root - Verify the port number matches what’s shown in the connection details
SFTP client can't find host
SFTP client can't find host
Problem: SFTP client cannot resolve the host addressSolution:
- Verify your Pod is running and not stopped
- Check that you’re using the correct IP address and port from the connection details
- Ensure your network allows outbound connections to the Runpod IP range
Tips
- The password is automatically saved to
/workspace/root_password.txtfor your reference. - For large file transfers, use a dedicated SFTP client like FileZilla or WinSCP instead of the command line.